Brand | VIOFO |
---|---|
Manufacturer | VIOFO |
Place of Business | Shenzhen, Guangdong 518131,CN |
Model | A129GPS |
Part Number | A129GPS |
Special features | F1.6 Aperture 7 Elements Glass Lens (Same for Rear Camera), Dual Channel Full HD Video Recording, Sony Starvis Image Sensor (Same for Rear Camera), 2.0 inch HD LCD Display, 140 Degree Wide Viewing Angle |
Mounting Hardware | Front and rear cameras (with mounts), 12V cigarette lighter aapter, rear connecting cable |
Standing screen display size | 2 Inches |
Display type | LCD |
Video capture resolution | 1080p |
Power source type | DC |
Batteries included | No |
Batteries Required | No |
Connector Type | Wi-Fi |
Mounting type | Adhesive Mount |
Actual viewing angle | 140 Degrees |
Manufacturer | VIOFO |
Item model number | A129GPS |
Product Dimensions | 4.11 x 5.08 x 8.26 cm; 18.14 g |
ASIN | B07CT6JPYW |
Enjoy Prime FREE for 30 days
Here's what Amazon Prime has to offer:
Delivery Speed | ![]() |
---|---|
Same-Day Delivery (in select cities) | FREE |
One-Day Delivery | FREE |
Two-Day Delivery | FREE |
-
-
-
-
-
-
-
VIDEO
-
![](https://cdn.statically.io/img/images-na.ssl-images-amazon.com/images/G/01/x-locale/common/grey-pixel.gif)
Image Unavailable
Colour:
-
-
-
- To view this video, download Flash Player
VIOFO A129 Duo 2-Channel Full HD 1080p 30fps Car Dash Camera with GPS Logger
Purchase options and add-ons
Brand | VIOFO |
Orientation | Front and Rear |
Vehicle service type | Car |
Connectivity technology | Wi-Fi |
Special feature | F1.6 Aperture 7 Elements Glass Lens (Same for Rear Camera), Dual Channel Full HD Video Recording, Sony Starvis Image Sensor (Same for Rear Camera), 2.0 inch HD LCD Display, 140 Degree Wide Viewing Angle See more |
Video capture resolution | 1080p |
Included components | Front and rear cameras (with mounts), 12V cigarette lighter aapter, rear connecting cable |
Mounting type | Adhesive Mount |
Field of view | 140 Degrees |
Control method | App |
About this item
- THE SONY STARVIS EXPERIENCE. Featuring the all new Sony Starvis Image Sensor. Enhancing your day & night recording with vibrant and crystal clear quality. Finally will you be able to capture those pedestrian facial expressions!
- TWO CHANNEL system for recording both the front and rear view of your vehicle. Capture those fender-benders from the rear!
- FULL HD RECORDING for both front and rear camera in 1920 x 1080p at 30fps. No longer will you have to sacrifice video quality for a two-channel view of your vehicle.
- DUAL BAND Wi-Fi for a more stable connection when connecting to your smartphone. Enhance your playback experience without the annoying leg or loss of connection.
- 2.0" HD SCREEN for instant playback of previously recorded video & audio files or for adjusting camera settings on the go. Not while driving of course!
Additional details
![](https://cdn.statically.io/img/m.media-amazon.com/images/I/111mHoVK0kL._AC_UL34_SS42_.png)
There is a newer model of this item:
Frequently bought together
![VIOFO A129 Duo 2-Channel Full HD 1080p 30fps Car Dash Camera with GPS Logger](https://cdn.statically.io/img/images-na.ssl-images-amazon.com/images/I/71e1ITzp-BL._AC_UL116_SR116,116_.jpg)
Videos for similar products
From the brand
![dash cam](https://m.media-amazon.com/images/S/aplus-media-library-service-media/6779f557-9c4c-48a0-b4a5-6fc7067d240d.__CR0,0,1464,625_PT0_SX1464_V1___.jpg)
-
-
Dual STARVIS 2 Dashcam
-
2024 New Release
-
-
-
Best Value Dash Cam
-
4K Dash Cam
-
3 Channel Dash Cam
-
-
Product Description
![1](https://m.media-amazon.com/images/S/aplus-media/sc/3e7d4a05-3677-4750-98d2-2fba60cb0cea.__CR0,0,970,600_PT0_SX970_V1___.jpg)
Premium Features
|
|
|
---|---|---|
Front and Rear Full HD 1080PA129 Duo records the road front and rear in 1080P Full HD. Dual-channel 140° wide angle achieves a broader view. F1.6 Aperture 7 Elements Glass Lens captures rich details and vivid colors. License plates could be captured much more clearly. |
Dual-Band Wi-FiA129 Duo dash cam applies 2.4GHz and 5GHz dual-band Wi-Fi, which could transmit in two different standard frequency ranges to avoid wireless interference. A more stable Wi-Fi signal and faster Wi-Fi speed bring blazing speed for file transfer. |
GPS TrackingThe GPS logger records speed and route data in the video file, allowing compatible viewers to display the data on playback. It will also keep the camera’s clock synchronized with GPS time so the video files are correctly time stamped. |
|
|
|
---|---|---|
High-Temperature ResistanceA129 Duo is your best choice dual-channel dashcam considering hot weather. The dashcam shell uses upgraded high-temperature resistant material. With supercapacitor, it can support high-temperature operation up to 149℉. |
3 Parking Mode SolutionsA129 Duo has 3 parking mode solutions for you to choose, Auto Event Detection will automatically start recording once any event is detected; Time Lapse continuously records a video at low frames. Low Bitrate keeps recording continuously in mini file size. |
Built-in SupercapacitorA high-quality supercapacitor ensures a more stable power and longer lifetime. This dash cam has excellent performance from 5℉ to 149℉ in extreme hot summer and cold winter. |
Specifications
Resolution | Front: 1920 x 1080P 30fps; Rear: 1920 x 1080P 30fps |
Image Sensors | Front: Sony STARVIS IMX291; Rear: Sony STARVIS IMX291 |
Operating Temperature | -10℃~65℃ (14℉~149℉) |
Wide Angle | Front & Rear: 140° |
Battery | Built-in Supercapacitor |
G-sensor | Off / Low / Middle / High Sensitivity |
Battery | Built-in Supercapacitor |
Input Power | DC5.0V/2A |
Ports | Mini USB, AV-Out, MicroSD Card Slot |
Language | 简体中文/繁体中文 /English/Francais /Espanol/Portugues/Deutsch/ltaliano/PycckNN/日本语/Turkce/Romana/Polski/Česky/Slovensky |
Dimension | Front: 3.25x2x1.62 inches ; Rear: 1.95x2.05x1.24 inches |
Packing List | Front & Rear Camera/ Rear Camera Cable(6M)/ Car Charger/ Mini USB Cable 4 Meters/ GPS Module (base) / Card Reader Adapter/ Front & Rear Mount 3M Sticker/ Trim Removal Tool/ Static (Windshield) Stickers/ 5* Clips |
![]() |
![]() |
![]() |
![]() |
![]() |
|
---|---|---|---|---|---|
A139 3CH | A129 Pro Duo | A129 Plus Duo | A129 Duo | A119 V3 | |
Customer Reviews |
4.0 out of 5 stars
579
|
4.2 out of 5 stars
2,511
|
4.2 out of 5 stars
2,532
|
4.4 out of 5 stars
1,329
|
4.4 out of 5 stars
6,009
|
Price | — | $309.99$309.99 | $229.99$229.99 | $178.41$178.41 | $139.00$139.00 |
Camera Type | Front + Interior + Rear | Front + Rear | Front + Rear | Front + Rear | Front |
Resolution | Front: 2560 x 1440P 30fps ; Interior: 1920 x 1080P 30fps; Rear: 1920 x 1080P 30fps | Front: 4K (3840 x 2160 30fps) ; Rear: Full HD (1920 x 1080P 30fps) | Front: 2560 x 1440P 30fps ; Rear: 1920 x 1080P 30fps | Front & Rear: 1920 x 1080P 30fps; Only Front: 1920 x 1080P 60fps | 2560*1600P 30fps; 2560*1440P 60/30fps; 2560*1080P 60/30fps |
Image Sensor | Front: Sony IMX335 Sensor 5MP; Interior:Sony STARVIS IMX291; Rear: Sony STARVIS IMX291 | Front: Sony IMX317 Sensor 8MP; Rear: Sony STARVIS IMX291 | Front: Sony 5MP Sensor; Rear: Sony STARVIS IMX291 | Front & Rear: Sony STARVIS IMX291 | Sony 5MP Sensor |
Viewing Angle | Front: 140° ; Interior & Rear: 170° | Front: 130° ; Rear: 140° | Front & Rear: 140° | Front & Rear: 140° | 140° |
Display Screen | No Screen | 2.0" | 2.0" | 2.0" | 2.0" |
Wi-Fi | ✓ | ✓ | ✓ | ✓ | No |
GPS logger | ✓ | ✓ | ✓ | ✓ | ✓ |
Max MicroSD Card | 256GB | 256GB | 256GB | 256GB | 256GB |
Support External Microphone | ✓ | No | No | No | No |
Compare with similar items
This Item ![]() VIOFO A129 Duo 2-Channel Full HD 1080p 30fps Car Dash Camera with GPS Logger | Recommendations | dummy | dummy | dummy | dummy | |
Try again! Added to Cart | Try again! Added to Cart | Try again! Added to Cart | Try again! Added to Cart | Try again! Added to Cart | Try again! Added to Cart | |
Price | -15% $178.41$178.41 List: $209.90 | -29% $249.99$249.99 List: $349.99 | -5% $179.99$179.99 List: $189.99 | $449.99$449.99 | $179.99$179.99 | $319.99$319.99 |
Delivery | Get it by Friday, Jul 12 | Get it by Friday, Jul 12 | Get it by Friday, Jul 12 | Get it by Friday, Jul 12 | — | Get it by Friday, Jul 12 |
Customer ratings | ||||||
Picture quality | 4.5 | 5.0 | 4.2 | 4.3 | — | 3.7 |
Camera quality | 4.3 | 5.0 | 4.1 | 4.0 | — | 3.7 |
Night vision | — | 4.6 | 4.2 | 3.6 | — | 3.6 |
Sold by | BlackboxMyCar | BlackboxMyCar | VIOFO LTD | VIOFO LTD | BlackboxMyCar | BlackboxMyCar |
display type | LCD | LCD | LCD | LCD | — | LCD |
display size | 2 inches | 2.4 inches | — | — | — | 2.4 inches |
video resolution | 1080p | Front&Rear: 1440P | 2K: 2560x1440P; 2592x1944P | Front 2160P, Rear 1440P | 1440P 30fps | 1440p |
mounting type | Adhesive Mount | 3M Sticker & Static Windshield Sticker | 3M Sticker & Static Windshield Sticker | 3M Sticker & Static Windshield Sticker | Windshield Mount | Suction Mount |
auto part position | front | rear | front | rear | front | front |
control method | application | application | application | application | application | application |
real angle of view | 140 degrees | — | 140 degrees | 135 degrees | 140 degrees | 170 degrees |
batteries included | ✗ | ✗ | ✗ | ✗ | ✗ | ✗ |
Looking for specific info?
Product information
Technical Details
Additional Information
Date First Available | May 15 2018 |
---|---|
Customer Reviews |
4.4 out of 5 stars |
Best Sellers Rank | #22,830 in Electronics (See Top 100 in Electronics) #265 in Car On-Dash Mounted Cameras |
Is discontinued by manufacturer | No |
Feedback
![](https://cdn.statically.io/img/m.media-amazon.com/images/I/41evwyxW4vL._SS75_.jpg)
VIOFO A129 Duo 2-Channel Full HD 1080p 30fps Car Dash Camera with GPS Logger
Share:
Found a lower price? Let us know. Although we can't match every price reported, we'll use your feedback to ensure that our prices remain competitive.
Where did you see a lower price?
Fields with an asterisk * are required
Brands in this category on Amazon
Customer reviews
Reviews with images
![Refurbished or brand new.. no idea :-(](https://cdn.statically.io/img/images-na.ssl-images-amazon.com/images/G/01/x-locale/common/transparent-pixel._V192234675_.gif)
-
Top reviews
Top reviews from Canada
There was a problem filtering reviews right now. Please try again later.
There's an app, and they offer Wi-Fi control, but like, don't even bother. The app is super finicky to get connected. That being said, once it finally gets hooked up, the app works great, and you can transfer footage to your phone straight from the camera, or just straight up stream it to your phone. Just beware it's kind of a pain to initially connect, and once you turn on Wi-Fi control you MUST use it, unless you turn it off.
I have a 64gb card in mine and it tends to save about a week (more like 8 or 9 days) of footage, front and back included. Honestly though, 32 or even 16gb can be fine, as LONG as you remember to a) hit the button or b) get the card out and save footage as soon as something happens that you want to save.
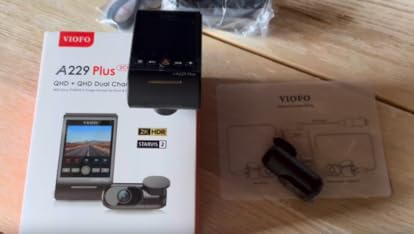
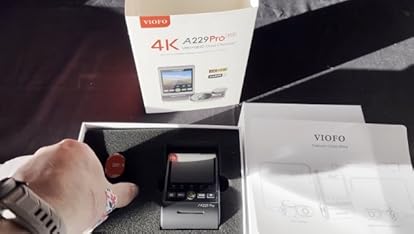
VIOFO has done a good job here, all their cams are good ones. Personally I would recommend this one because of the rear cam, but if you are willing to forego it, there are higher resolution cameras from VIOFO that will let you read plates from across the street. However, I've found that's never been particularly necessary. Either way, buy a dashcam. Everyone should have one if they have a car.
The box came with the following:
- Front Camera (GPS plate already attached)
- Rear Camera
- 10ft~ Mini USB cable to power the front GPS mount and camera
- 10 - 15ft Mini USB cable to connect the rear facing camera to the front. The connector to the front camera is sat at a 90 degree angle
Cigarette Lighter Power adaptor (2x USB)
Trim Removal Tool
4x Black cable clips
Replacement double-sided tape for the cameras
***INSTALLATION***
My opinion on the installation is based on my vehicle, the 2016 Honda HR-V. You may have a better experience than me, depending on the vehicle the camera is being installed in to.
Installing the cameras to the glass was simple. I found the best way to identify the optimal placement was to power the camera and connect to it through the VIOFO app. From here, you can press the camera against the glass and figure out the best spot. I then removed the double sided tape on the other side of the camera and pressed against the glass for a good 30 seconds.
It would be great if VIOFO provided alcohol wipes to ensure the mounting surface is clean and dust-free, but it's not totally necessary.
Running the cables to the power source and rear camera is where things started to get frustrating. Unfortunately, my vehicle doesn't have the most removable of trims, so I was forced to run the cables down the passenger side pillar and down the side of the dash. This was all well and good but I very quickly ran out of clips to keep it tidy.
VIOFO - PLEASE PROVIDE MORE CLIPS IN FUTURE! 4 is great for a single camera setup but nowhere near enough for both front and rear! I have placed an order for a pack of 40 at $15CAD, so keep this in mind when planning out the cable run.
One final not, I ended up reversing the rear camera cable. I had to install the 90 degree side of the cable in to the rear camera as opposed to the front. This was because the rear camera port is at the top, and it was too close to the trim. The connection in to the front camera isn't as tidy, but it's not too bad.
THE CAMERA DOES ALSO NOT COME WITH A MICRO-SD CARD, YOU WILL NEED TO ORDER THIS SEPARATELY!
***CAMERA QUALITY***
I will be testing this over the next week and will update the review in due course :)
I own a 2024 Rav 4 trail and it took about 1.5 hours in total. Oh the app is “glitchy” when connecting but other than that I highly recommend this thing :)
Top reviews from other countries
![](https://images-na.ssl-images-amazon.com/images/S/amazon-avatars-global/a3a13d19-dda7-4599-b329-06da091256af._CR0,0,826,826_SX48_.jpg)
I've changed my Viofo A119 for this one, with the rear camera. It was the best upgrade so far.
If you're looking for a inside-car dash camera, this is not the camera for you.
Best features:
With wifi 5Ghz, now downloads are way faster and instant.
Rear camera is great. However doubles the storage usage. 128GB MicroSD is recommended. I'm using 64 right now and 2 files fill up quickly (front and rear).
Viofo app is good an gives you a great range of options, being the best way to configure your dash camera before installing and after installation.
Installation require some time and patience but stick to the manual and these tips and you'll be fine.
NOTE: I'm not using motion detection and parking features and these other offline features, just dash cam with the power adapter upfront. If you know how to do it great, if not, ask your mechanic or car electrician in how to install these features.
Camera is discreet and doesn't show much when looking from outside (check pictures). Microphone is very good (compared with other models).
Remember:
Front and Rear recordings limits quality on both: 1080p with 30FPS. 60FPS or higher only when recording exclusively from front camera. This can be customized from Setup menu.
Tutorial for installation:
FIRST THINGS FIRST:
Configure the device prior to installation in your vehicle: wifi password, SSID and everything else. It's EASIER THIS WAY.
Attach all cables as it would if installed in your car. This should be temporary: Just for testing and configuring purposes.
IMPORTANT NOTE: Remember that the lenses are blocked by a black opaque adhesive.
Remove it temporarily before turning it on, or else you're going to see black displays and you are going to be mad that you've got a broken camera and that's (probably) not true. :-)
Use an regular USB at home (a MicroUSB cable with an iPad Charger will do the trick) to power on the device: And then:
- update it's firmware. (Check viofo's website for the correct procedure)
- Learn how to configure it via the phone app;
- Learn basic functions, specially switching camera previews;
- Add MicroSD card, format it (it can be the same you used to update the firmware);
- Sync the Bluetooth Button (if you bought it) so it's preset;
- Customize with your preferences.
After all that setup:
Go to your car.
Bring everything that was in the box, and also a Screwdriver (medium size). It's not mandatory but it may be required.
Remove all crap from your trunk so you have plenty of space to work the cables back there.
I've installed mine in an apartment garage with cars close by and in the rear, so I Could check proximity with licence plates (you'll understand this in the rear camera comments below). Framing the rear camera needs a little more attention to detail.
Now, for the procedure:
Attach the front camera first.
Make sure you pass the power cable for this camera right to left, through the front door and under the rubber band, and then behind the lower part of the steering wheel until it reaches the power adapter or USB adapter.
If there is extra USB cable not being used, hide it below the driver framing above the pedals.
Choose a spot right behind the center mirror. (Check my picture for reference). I usually choose the body of the camera to be behind the black sunblocker (or blue in some old car models) so It's difficult to be seen outside the car.
Make sure that the center mirror will not block access to the USB ports that will be attached to the thick cable that goes to the rear camera.
As the manual points out, the power goes directly to the GPS brick where the camera should fit.
After that, for rear-camera configuration sake, attach the thick cabe and the rear camera for configuration (see rear camera comments below).
NOTE: You can use the same cable if you have one already installed, as long as it's MINIUSB, not MICROUSB (will not fit). If in doubt: change the cables.
NOTE: Change the power adapter. It's recommended that you use the one in the box. The prior one might have a lower power output, and this might compromise device functionality.
Rear camera installation:
I strongly recommend you install the front camera first and then attach the rear camera, use your Phone to check the back camera framing (that's why it's important to setup the camera and app at home first before installing in your car, you'll be able to learn all of this), and attach the thick cable in both cameras and power everything so you can check angles first.
Usually many cars have those brown antifog stripes. That's why i Recommend checking angles before installing/attaching the rear camera, because the stripe will eventually appear in the camera feed, so you don't want it blocking the lower part of the lens, where you are supposed to see/record the licence plate.
It's better to have the stripe in the upper part of the lens (car is far away anyway) then in the lower part (car is close by), in my humble opinion.
When you find the right spot for the rear camera, also make sure that It will not hit anything else in your trunk during opening and closing;
NOTE: You'll probably see the camera brick when looking at your center mirror, but it's not a dealbreaker, even if you center the camera in the back glass.
NOTE: Cable should suffice for a small to medium car size. If you have a big SUV or a big SEDAN, make sure you plan the cable routing correctly beforehand.
Remember that there are many ways to fit the cable through, some may be more difficult, others easier.
My car was a Honda FIT Model, it's considered a Small car for US Standards.
Use the plastic plier that comes with the box to help you with this process. If you're not getting the result you want, use a medium Screwdriver to help you.
In my case, I've passed the cable up the roof, right door, then the lower part of the right door, then up to the roof again, and then to the rear of the roof until the camera (that was already tested, framed and attached to the rear glass).
Those are the tips that I have. Hope you like them.
I'm very satisfied with Viofo. Hope you will be too.
![Customer image](https://cdn.statically.io/img/images-na.ssl-images-amazon.com/images/G/01/x-locale/common/transparent-pixel._V192234675_.gif)
![](https://images-na.ssl-images-amazon.com/images/S/amazon-avatars-global/a3a13d19-dda7-4599-b329-06da091256af._CR0,0,826,826_SX48_.jpg)
Reviewed in the United States on September 6, 2020
I've changed my Viofo A119 for this one, with the rear camera. It was the best upgrade so far.
If you're looking for a inside-car dash camera, this is not the camera for you.
Best features:
With wifi 5Ghz, now downloads are way faster and instant.
Rear camera is great. However doubles the storage usage. 128GB MicroSD is recommended. I'm using 64 right now and 2 files fill up quickly (front and rear).
Viofo app is good an gives you a great range of options, being the best way to configure your dash camera before installing and after installation.
Installation require some time and patience but stick to the manual and these tips and you'll be fine.
NOTE: I'm not using motion detection and parking features and these other offline features, just dash cam with the power adapter upfront. If you know how to do it great, if not, ask your mechanic or car electrician in how to install these features.
Camera is discreet and doesn't show much when looking from outside (check pictures). Microphone is very good (compared with other models).
Remember:
Front and Rear recordings limits quality on both: 1080p with 30FPS. 60FPS or higher only when recording exclusively from front camera. This can be customized from Setup menu.
Tutorial for installation:
FIRST THINGS FIRST:
Configure the device prior to installation in your vehicle: wifi password, SSID and everything else. It's EASIER THIS WAY.
Attach all cables as it would if installed in your car. This should be temporary: Just for testing and configuring purposes.
IMPORTANT NOTE: Remember that the lenses are blocked by a black opaque adhesive.
Remove it temporarily before turning it on, or else you're going to see black displays and you are going to be mad that you've got a broken camera and that's (probably) not true. :-)
Use an regular USB at home (a MicroUSB cable with an iPad Charger will do the trick) to power on the device: And then:
- update it's firmware. (Check viofo's website for the correct procedure)
- Learn how to configure it via the phone app;
- Learn basic functions, specially switching camera previews;
- Add MicroSD card, format it (it can be the same you used to update the firmware);
- Sync the Bluetooth Button (if you bought it) so it's preset;
- Customize with your preferences.
After all that setup:
Go to your car.
Bring everything that was in the box, and also a Screwdriver (medium size). It's not mandatory but it may be required.
Remove all crap from your trunk so you have plenty of space to work the cables back there.
I've installed mine in an apartment garage with cars close by and in the rear, so I Could check proximity with licence plates (you'll understand this in the rear camera comments below). Framing the rear camera needs a little more attention to detail.
Now, for the procedure:
Attach the front camera first.
Make sure you pass the power cable for this camera right to left, through the front door and under the rubber band, and then behind the lower part of the steering wheel until it reaches the power adapter or USB adapter.
If there is extra USB cable not being used, hide it below the driver framing above the pedals.
Choose a spot right behind the center mirror. (Check my picture for reference). I usually choose the body of the camera to be behind the black sunblocker (or blue in some old car models) so It's difficult to be seen outside the car.
Make sure that the center mirror will not block access to the USB ports that will be attached to the thick cable that goes to the rear camera.
As the manual points out, the power goes directly to the GPS brick where the camera should fit.
After that, for rear-camera configuration sake, attach the thick cabe and the rear camera for configuration (see rear camera comments below).
NOTE: You can use the same cable if you have one already installed, as long as it's MINIUSB, not MICROUSB (will not fit). If in doubt: change the cables.
NOTE: Change the power adapter. It's recommended that you use the one in the box. The prior one might have a lower power output, and this might compromise device functionality.
Rear camera installation:
I strongly recommend you install the front camera first and then attach the rear camera, use your Phone to check the back camera framing (that's why it's important to setup the camera and app at home first before installing in your car, you'll be able to learn all of this), and attach the thick cable in both cameras and power everything so you can check angles first.
Usually many cars have those brown antifog stripes. That's why i Recommend checking angles before installing/attaching the rear camera, because the stripe will eventually appear in the camera feed, so you don't want it blocking the lower part of the lens, where you are supposed to see/record the licence plate.
It's better to have the stripe in the upper part of the lens (car is far away anyway) then in the lower part (car is close by), in my humble opinion.
When you find the right spot for the rear camera, also make sure that It will not hit anything else in your trunk during opening and closing;
NOTE: You'll probably see the camera brick when looking at your center mirror, but it's not a dealbreaker, even if you center the camera in the back glass.
NOTE: Cable should suffice for a small to medium car size. If you have a big SUV or a big SEDAN, make sure you plan the cable routing correctly beforehand.
Remember that there are many ways to fit the cable through, some may be more difficult, others easier.
My car was a Honda FIT Model, it's considered a Small car for US Standards.
Use the plastic plier that comes with the box to help you with this process. If you're not getting the result you want, use a medium Screwdriver to help you.
In my case, I've passed the cable up the roof, right door, then the lower part of the right door, then up to the roof again, and then to the rear of the roof until the camera (that was already tested, framed and attached to the rear glass).
Those are the tips that I have. Hope you like them.
I'm very satisfied with Viofo. Hope you will be too.
![Customer image](https://cdn.statically.io/img/m.media-amazon.com/images/I/71aO-G0j46L._SY88.jpg)
![Customer image](https://cdn.statically.io/img/m.media-amazon.com/images/I/613Sf4Q18bL._SY88.jpg)
![Customer image](https://cdn.statically.io/img/m.media-amazon.com/images/I/71MZyW4SiEL._SY88.jpg)
![](https://images-eu.ssl-images-amazon.com/images/S/amazon-avatars-global/default._CR0,0,1024,1024_SX48_.png)
Pros: Received as mentioned quality of recording, inclusion of trim remover, 12V USB charger and sufficient length of both front and rear cables
Cons : Provision of Mini USB cable instead of micro USB cable, Non inclusion of Hard wiring for power USB cable
![](https://images-fe.ssl-images-amazon.com/images/S/amazon-avatars-global/default._CR0,0,1024,1024_SX48_.png)
Very impressed with the product followed by the after sales service.
![](https://images-na.ssl-images-amazon.com/images/S/amazon-avatars-global/c20eb3ef-4ffe-445d-8d89-a6a566a30890._CR0,0,500,500_SX48_.jpg)
I bought this 2 channel cam to replace my 2 cam setup that I had in my 2007 Toyota Highlander. How I installed the camera and general experience. The box the VIOFO A129 Duo is packaged in is pretty sound and is very much like a Galaxy S7 box. Inside the box the cameras are encased in an ample amount of foam padding, the Gps is the front camera mount, 2 extra sets of cut to fit 3m mounting pads, necessary cables that are clearly labeled, adhesive cable support clips, directions for camera setup and basic installation, 12/24 volt 3 amp accessory power adapter (it will charge your phone ridiculously fast but be careful not many devices are rated to handle 3 amps) ect.
I first plugged the camera into my computer to supply power while I played with the menu and set the camera up. The menu is very similar to other camera's so finding the reformat option was simple enough, your going to want to do that first. I set the camera to loop in 3 min segments and didn't adjust video quality or effects. I will be using the GPS but decided to remove the M.P.H time stamp. Keep in mind to turn the WiFi off when you're not actually accessing it with your phone which causes unnecessary strain on the processor especially if you live in a HOT environment. If you have a smaller SD card or want smaller file sizes adjust the video to 720p. The video the camera captures is pretty impressive and the picture is pretty decent in low light conditions.
I downloaded and installed the app for my galaxy s7 but I could not get it to work. however, my attempt to pair the phone with the camera wasn't really sweat inducing and I haven't tried again. I will say that the buttons on the camera do not work when you have the WiFi on. I Turned the "button press" and not recording beeping alert off, the beep will get old quickly.
Before you tear open all the little bags and undo accompanying twist ties formulate a plan of how you plan on running the cables mounting the cameras and available 12/24 volt outlet. Now that you have a plan you want to mount the camera out of the line of sight and as nearest to the center line of the window but not in the factory tint at the top of the wind shield( avoiding tint was a warning in the instruction manual ) which brings you to the review mirror. When you decide you have a good spot by the mirror make sure you thoroughly clean the area and go ahead and plug the power cable into the GPS mount and rear power/video cable into the camera to make sure there's enough room for you to remove the plugs( even if you don't plan on powering it through the GPS, I still recommend allowing room because those adhesive pads are a 'expletive' to remove )
When you dig out all of the camera accessories out the first thing you will notice just like 90% of reviewers did is that the rear camera cable is ridiculously thick(Bic pen-ish). If you're installing this camera in an SUV your only option to hide the rear camera cable is up or don't hide it at all and use the provided clips. I ran the rear camera cable vertically to the headliner then tucking it up under the headliner along the windshield heading toward the passenger side. Popping the A pillar cover off allowed me to work the cable around the corner to the door frame. Once I got to the passenger side I pulled the door gasket down exposing the edge of the roof liner tucking the cable in heading to the rear. When you get to the B, C, D pillars you will have to pop them out just like you did the A pillar. I then ran the cable back to center of the roof line along the rear hatch. Where the hinges are on the rear hatch you should have a rubber conduit that the manufacturer ran the power cables for the rear lights, wipers, defrost, ect. allowing you to run the cable discretely through it. I ran the camera cable through two gaskets where a conduit would have been. NOTE: If you have side curtain airbags make sure that you push the cable in past them and do not crisscross the cable over them.
The 3 wire hardware kit sold by VIOFO installation is fairly underwhelming. The diameter of the power cable is of resonable size but it's long enough to hang a snake! The little over 12ft cable comes with 90° usb plug for the camera, a (red//bare) power, (yellow/bare) Acc, (black/spade connector) ground wires for the source and it has a 4 position Batt. voltage monitor(2xAdd a Circuit).
Honestly it's just as easy as installing the video camera; the one exception is hooking up the Add a Circuit. I chose the Rear Wiper for (acc/yellow), Acc 12PWR (power/red) and I attached the ground right to the bolt that allowed me a tiny bit more access to the panel. They decided it would be wise to include on the cord a ferrite bead 6 inches from the camera. The bead adds some weight and makes it more tough to disguise the power cord in your headliner when the weight of it keeps dragging it down. My solution was to wrap the bead in adhesive Velcro and attached a small spot on my windshield (will it work I dunno, its what I had on hand). I decided to mount the voltage selection on the backside of the dash 1. so I don't have to hear it jingle jangle 2. so the voltage option does not get changed accidentally.
All in all I'm happy with the cameras and other than some patients and learning your vehicle
![Customer image](https://cdn.statically.io/img/images-na.ssl-images-amazon.com/images/G/01/x-locale/common/transparent-pixel._V192234675_.gif)
![](https://images-na.ssl-images-amazon.com/images/S/amazon-avatars-global/c20eb3ef-4ffe-445d-8d89-a6a566a30890._CR0,0,500,500_SX48_.jpg)
Reviewed in the United States on December 4, 2018
I bought this 2 channel cam to replace my 2 cam setup that I had in my 2007 Toyota Highlander. How I installed the camera and general experience. The box the VIOFO A129 Duo is packaged in is pretty sound and is very much like a Galaxy S7 box. Inside the box the cameras are encased in an ample amount of foam padding, the Gps is the front camera mount, 2 extra sets of cut to fit 3m mounting pads, necessary cables that are clearly labeled, adhesive cable support clips, directions for camera setup and basic installation, 12/24 volt 3 amp accessory power adapter (it will charge your phone ridiculously fast but be careful not many devices are rated to handle 3 amps) ect.
I first plugged the camera into my computer to supply power while I played with the menu and set the camera up. The menu is very similar to other camera's so finding the reformat option was simple enough, your going to want to do that first. I set the camera to loop in 3 min segments and didn't adjust video quality or effects. I will be using the GPS but decided to remove the M.P.H time stamp. Keep in mind to turn the WiFi off when you're not actually accessing it with your phone which causes unnecessary strain on the processor especially if you live in a HOT environment. If you have a smaller SD card or want smaller file sizes adjust the video to 720p. The video the camera captures is pretty impressive and the picture is pretty decent in low light conditions.
I downloaded and installed the app for my galaxy s7 but I could not get it to work. however, my attempt to pair the phone with the camera wasn't really sweat inducing and I haven't tried again. I will say that the buttons on the camera do not work when you have the WiFi on. I Turned the "button press" and not recording beeping alert off, the beep will get old quickly.
Before you tear open all the little bags and undo accompanying twist ties formulate a plan of how you plan on running the cables mounting the cameras and available 12/24 volt outlet. Now that you have a plan you want to mount the camera out of the line of sight and as nearest to the center line of the window but not in the factory tint at the top of the wind shield( avoiding tint was a warning in the instruction manual ) which brings you to the review mirror. When you decide you have a good spot by the mirror make sure you thoroughly clean the area and go ahead and plug the power cable into the GPS mount and rear power/video cable into the camera to make sure there's enough room for you to remove the plugs( even if you don't plan on powering it through the GPS, I still recommend allowing room because those adhesive pads are a 'expletive' to remove )
When you dig out all of the camera accessories out the first thing you will notice just like 90% of reviewers did is that the rear camera cable is ridiculously thick(Bic pen-ish). If you're installing this camera in an SUV your only option to hide the rear camera cable is up or don't hide it at all and use the provided clips. I ran the rear camera cable vertically to the headliner then tucking it up under the headliner along the windshield heading toward the passenger side. Popping the A pillar cover off allowed me to work the cable around the corner to the door frame. Once I got to the passenger side I pulled the door gasket down exposing the edge of the roof liner tucking the cable in heading to the rear. When you get to the B, C, D pillars you will have to pop them out just like you did the A pillar. I then ran the cable back to center of the roof line along the rear hatch. Where the hinges are on the rear hatch you should have a rubber conduit that the manufacturer ran the power cables for the rear lights, wipers, defrost, ect. allowing you to run the cable discretely through it. I ran the camera cable through two gaskets where a conduit would have been. NOTE: If you have side curtain airbags make sure that you push the cable in past them and do not crisscross the cable over them.
The 3 wire hardware kit sold by VIOFO installation is fairly underwhelming. The diameter of the power cable is of resonable size but it's long enough to hang a snake! The little over 12ft cable comes with 90° usb plug for the camera, a (red//bare) power, (yellow/bare) Acc, (black/spade connector) ground wires for the source and it has a 4 position Batt. voltage monitor(2xAdd a Circuit).
Honestly it's just as easy as installing the video camera; the one exception is hooking up the Add a Circuit. I chose the Rear Wiper for (acc/yellow), Acc 12PWR (power/red) and I attached the ground right to the bolt that allowed me a tiny bit more access to the panel. They decided it would be wise to include on the cord a ferrite bead 6 inches from the camera. The bead adds some weight and makes it more tough to disguise the power cord in your headliner when the weight of it keeps dragging it down. My solution was to wrap the bead in adhesive Velcro and attached a small spot on my windshield (will it work I dunno, its what I had on hand). I decided to mount the voltage selection on the backside of the dash 1. so I don't have to hear it jingle jangle 2. so the voltage option does not get changed accidentally.
All in all I'm happy with the cameras and other than some patients and learning your vehicle
![Customer image](https://cdn.statically.io/img/m.media-amazon.com/images/I/51Nd17oKj-L._SY88.jpg)
![Customer image](https://cdn.statically.io/img/m.media-amazon.com/images/I/71lpSBHTc-L._SY88.jpg)
![Customer image](https://cdn.statically.io/img/m.media-amazon.com/images/I/610Tx1tSmSL._SY88.jpg)
![Customer image](https://cdn.statically.io/img/m.media-amazon.com/images/I/713J3K3OXOL._SY88.jpg)
![Customer image](https://cdn.statically.io/img/m.media-amazon.com/images/I/61IO7V7TvlL._SY88.jpg)
![Customer image](https://cdn.statically.io/img/m.media-amazon.com/images/I/51CpXzHHa+L._SY88.jpg)
![Customer image](https://cdn.statically.io/img/m.media-amazon.com/images/I/51sjrREc-OL._SY88.jpg)
![Customer image](https://cdn.statically.io/img/m.media-amazon.com/images/I/71grL0MEtiL._SY88.jpg)
![](https://images-na.ssl-images-amazon.com/images/S/amazon-avatars-global/default._CR0,0,1024,1024_SX48_.png)
I can therefore recommend this unit to give you a clear and quality picture.
The unit was easy to install, set up and use and has many good features.
Important information
Safety Information
It is not safe to adjust camera or camera settings while operating a motor vehicle. Always keep your eyes on the road.
Visible screen diagonal
2" / 6 cm